Monday, December 30, 2013

Eating Clean 12 Days of Christmas -- Body Butter


Along with lip balm and body scrub, I also made some homemade body butter. Seriously, this was ridiculously easy. You take coconut oil, add it to your mixer, and just let it whip into a luscious, creamy mixture. Add in several drops of essential oils if you want a scent other than coconut and put into jars. Really, that's it! 

You only have to use a little on your body to go a long way too. I used too much and it ended up feeling too greasy. 


What I spent:
Coconut Oil -- $6.97
Essential Oil -- $3.99 (I only used about 1/3 so $1.33)
Jars -- $7.00 

Total cost -- $15.30 or $1.53 per jar

Friday, December 27, 2013

Eating Clean 12 Days of Christmas -- Sugar Body Scrub

Like I've mentioned before, I want to start exploring all-natural body products, so along with the lip balm, I made homemade sugar body scrub. The scrub was super easy...if you can stir two ingredients together you can make sugar scrub :) Not only does the scrub work just as well as expensive store-bought brands, it was significantly less expensive. Here's what I spent...

Kroger brand Turbinado sugar $3.50
Kroger brand baby oil $1.99
Essential oil $4 (but I only used 1/3 of the bottle so $1.33 worth approx.)
Jars $6
Total spent...$12.82 which made 6 jars, so $2.13/jar 
I could have probably made them even cheaper, but I went with the nicer glass jars since I was giving them as gifts. 

Here's the recipe I adapted from Martha Stewart
Homemade Body Scrub
Body oil (I used baby oil, but you could use any kind of oil you want)
Epsom salt, sea salt, or organic cane sugar (I wanted a sugar scrub, so I used turbinado sugar)
12 oz. jar with cap
Lemon zest or 9-10 drops of your favorite flavor of essential oil

Combine 1 cup of body oil with 2 cups of Epsom or sea salts or organic cane sugar (depending on how fine a grain you like). Add lemon zest or essential oils for color and fragrance. Package in jars.

Thursday, December 26, 2013

Clean Eating 12 Days of Christmas - Whiskey/Bourbon Bottle Soap Dispenser

Remember my earlier post about how hard it is to find gifts for the men in our families? This is another solution to that dilemma :) My father-in-law LOVES bourbon but has pretty much everything bourbon related already (at least everything we can afford ;). 

I saw on Etsy a bourbon bottle soap dispenser that I thought he would love and actually use. However, I didn't want to spend $40 on it, so I made my own. It was super easy...I took an empty bourbon bottle (I used one of his Maker's Mark ones he actually filled and sealed), washed it out good and filled with soap. For the dispenser part, go to the dollar store and find a $1 soap dispenser that's as tall or as nearly as tall as the bottle so that the straw reaches to the bottom of the bourbon bottle. Screw the dispenser and straw part onto the bourbon bottle and voila! Instant kitschy, fun and unique soap dispenser! I'm also going green and saving green by recycling and old bottle and only spending $1 on the dispenser.

Friday, December 20, 2013

Eating Clean 12 Days of Christmas -- Reese's Cup Cookies


For as much as I love sweets and sugar, you would think I would love all kinds of Christmas cookies. Oddly, though I don't like many of the traditional ones (cutout cookies, thumbprints, Russian tea cakes, etc.). So, when it comes time to bake for Christmas, I opt for the less traditional cookies that I'll actually eat. 
I'm also not much of a baker (I hate following recipes!) so usually I take as many shortcuts as possible (buying store bought cookie dough, using premade ingredients). This year, however, with my clean eating, I decided to make everything as clean as possible, even it meant taking a few extra steps. With my two helpers, it ended up being a great time and we had lots of fun! (Even though one of my helpers...ahem, G....ate half the Reese's Cups :P)

The first cookies we made are my all-time favorites...Reese's Cup Cookies. In the past, I would just buy store-bought peanut butter cookie dough and then add the Reese's Cups, but this year I made the peanut butter dough from scratch so it's all clean. Unfortunately, Reese's Cups aren't totally clean, but I'm invoking the 80/20 rule here because they're my favorite :)
These are so easy....make the peanut butter cookie dough. Roll into balls and put into well-greased mini muffin tins. Bake at 375 F for 8-10 minutes. As soon as you get the cookies out, press a Reese's Cup into each one and put the whole tin into the fridge, otherwise the Reese's will melt all over from the hot cookie and make a mess. Once they've hardened in the fridge, take out of the tins. Here's the recipe for the peanut butter cookies I used:

Peanut Butter Cookies 

From Creations by Kara

1 cup butter or margarine
1 cup peanut butter
1 cup sugar
1 cup brown sugar
2 eggs
3 cups flour
1 tsp baking powder
1 tsp baking soda
1/2 tsp salt


Cream butter, peanut butter, and sugars till creamy. Beat in eggs. Stir in dry ingredients.


Thursday, December 19, 2013

Eating Clean 12 Days of Christmas -- Etched Glasses

The men in our family are extremely hard to buy for when it comes to Christmas, birthday or any types of gifts. If they want something, they typically just get it for themselves. One thing I can always count on them liking is bourbon or beer, but really you can only only buy so much bourbon and beer every year (I'm sure the men are disagreeing with me now!). 

Thankfully, I came across a method for etching your own glasses and I thought it would be awesome to etch a bourbon decanter and glasses for my husband's brother. He's getting married this summer, so I thought these would be a great addition to their new home. I liked how they came out so much that we did some for another friend and some for ourselves. 

The process is pretty straightforward. Buy etching cream from a craft store. Decide what type of letter or design you want etched. For my T's, I got a scrapbook letter T that was the size and font I liked. Instead of putting the T on the glass, I cut out the outline of the T (the part you would normally throw away) and applied to the glasses. Etch over the sticker, let dry and remove the sticker. Easy peasy! You could also tape off whatever letter or design you want if you're more artistically-inclined.

You can find the full instructions on etching glasses Thistlewood Farms, who I got the idea from. I originally wanted to do the circle with the letter inside they do, but found it much too time-consuming for my purposes. I couldn't find the right type of circle stickers and didn't want to tape off a circle on the glass.

Wednesday, December 18, 2013

Eating Clean 12 Days of Christmas -- Lip Balm


I love chapstick and since I want to explore more all-natural and clean beauty products, I thought I'd start with my own lip balm. Plus, I wanted to use these as cute little Christmas gifts for my girlfriends. I did a lot of research and the process of making your own lip balm is super easy.
I found it hard to track down all the ingredients in one place though. Thankfully, I found several online retailers that make it easy buy selling kits. The kit I bought (here) had everything I needed and so when I went to make them, it took me less than 10 minutes. You get to choose your flavor and they include the lip balm base (a mixture of beeswax and other oils) and the pots or tubes. You melt the base, add in the flavor and put in your pots or tubes. Let harden and add cute labels if you want. That's it!! 

How easy is that? And it's clean clean clean!!

Tuesday, December 17, 2013

Eating Clean 12 Days of Christmas -- Homemade Hot Cocoa Mix


As part of the Christmas season, I want to share with you 12 eating clean and saving green Christmas ideas. They'll include recipes, gift ideas and more and hope they'll inspire you and keep you in the holiday spirit!
 
My family loves hot chocolate so I searched for clean recipes and found a yummy one from Southern Living. I also used this recipe to put together cute little Christmas gifts for the grandparents.

Homemade Hot Cocoa Mix
From Southern Living
 

1 1/2 cups 53% cacao dark chocolate morsels (I used mini semi-sweet chocolate chips)
1 1/4 cups sugar 

1 cup instant nonfat dry milk
2/3 cup dark unsweetened cocoa (I used regular)

Stir together dark chocolate morsels, sugar, instant nonfat dry milk, and cocoa; spoon into 1 (2-qt.) jar. Store at room temperature up to 1 month.


TO MAKE HOMEMADE HOT COCOA: Heat 1 cup milk to 180°; stir in 1/4 cup Homemade Hot Cocoa Mix.

Monday, December 16, 2013

Chocolate Chip Brownie Pie

It had been a while since I had made a dessert. Thankfully, I had to make a dessert for Advent by Candlelight and opted for this chocolate chip brownie pie. I adjusted some of the ingredients to make it gluten-free for my mom and I thought it turned out great. 

Chocolate Chip Brownie Pie

Adapted from Fahrenheit 350
 

6oz. Hershey's Cookies 'n' Creme Chocolate Candy Bar (I used regular Hershey's bars)
½ cup sugar
½ cup butter
 

Melt over med low heat until melted. Whisk in 2 lightly beaten eggs and ½ teaspoon vanilla.
Add:
1 cup flour (I used gluten-free flour)
½ teaspoon baking powder
pinch of salt
 

Stir until mixture is incorporated and smooth. Pour into greased 9" springform pan. Bake at 350°, 20 minutes. Remove from oven. Immediately pour 7oz. sweetened condensed milk over top of brownies. Layer with ¾ cup mini semi sweet chocolate chips and let cool before eating.

Friday, December 13, 2013

Garlic Marinated Pork

I usually adapt most of the recipes I use based on what ingredients I have on hand or my prep time. This one I followed to a tee, except I marinated mine overnight, giving it even more flavor! Be careful not to overcook the pork and dry it out.

Served with mashed potatoes and green beans, this was a delicious winter meal.

Pork Tenderloins

From Foodie Sisters
 

1 package of pork tenderloins (2 tenderloins total about 2-2.5lbs)
4 garlic cloves, quartered/sliced/slivered
1/4 cup soy sauce
2 tablespoon country dijon mustard
4 tablespoon honey
2 tablespoon fresh orange juice
1 tablespoon finely chopped fresh rosemary or Herbs de Provence
freshly ground pepper, to taste
3 tablespoon olive oil


Preheat oven to 350 degrees. Take tenderloins out of package. Rinse and pat dry. Spray a 9x13 baking dish and place tenderloins inside. Use a paring knife and poke holes on the top side of the tenderloins, about an inch deep. Place a garlic piece into each hole. Make the marinade next. In a measuring cup or bowl, whisk together everything except for olive oil. Then slowly drizzle in the oil while whisking.
Pour marinade over tenderloins. Bake, uncovered, for 45 minutes, basting once halfway through cooking process. Once removed from the oven, let pork rest on a cutting board for 10 minutes before cutting in.

Thursday, December 12, 2013

Chicken Cordon Bleu Casserole

I like the taste of Chicken Cordon Bleu but it's pretty time consuming to make. This casserole is easy and tastes just like the real thing. Plus, this would make a great freezer meal or meal to take to someone who's ill or just had a baby.

Chicken Cordon Bleu Casserole

Adapted from Tasty Kitchen

1 whole Cooked Chicken, Bones Removed, Meat Diced Or Shredded (Rotisserie chicken is Excellent, Should Be 5-6 Cups Of Chicken)
½ pounds Very Thinly Sliced Deli-style Honey Ham, Rough Chopped
¼ pounds Thin Sliced Baby Swiss Cheese
FOR THE SAUCE:
4 Tablespoons Butter
4 Tablespoons Flour
3-¼ cups Milk (I Used Whole Milk)
2 Tablespoons Fresh Squeezed Lemon Juice
1 Tablespoon Dijon Mustard
1-½ teaspoon Salt
½ teaspoons Smoked Paprika
¼ teaspoons White Pepper

Preheat oven to 350 F. Butter a 9- x 13-inch baking dish. Set aside. Put cooked shredded or diced chicken on the bottom of the baking dish. Rough chop the ham and scatter it over the top of the chicken. Lay the Swiss cheese on top of the ham.

For the sauce:

Melt the butter in a large sauce pot over medium heat. When butter is melted, quickly stir in the flour to form a smooth roux. Do not brown! Once the roux is smooth and bubbly, slowly pour in the cold milk while stirring briskly to make a smooth sauce. Cook over medium heat, stirring constantly until the sauce thickens. Stir in the lemon juice, Dijon mustard, salt, smoked paprika and white pepper. Bring sauce just back to a low boil and turn off heat. Pour sauce evenly over the casserole, being certain to get some of the sauce around the edges of the pan.

Bake casserole uncovered for 45 minutes until hot and bubbly throughout and top has turned a light golden brown. Remove from oven and allow to cool for 5-10 minutes prior to serving.

Wednesday, December 11, 2013

Feta-Stuffed Chicken

This one was all the hubby again, he took the original recipe and adapted it based on what we had in the house. It turned out to be a wonderful chicken dish with lots of great flavors (I love the way the feta melts on the grill with the cream cheese). It was super juicy too!

Feta-Stuffed Chicken
Adapted from Skinny Mom

Cheese Mixture
1/4 cup crumbled feta cheese
2oz. fat-free cream cheese
couple tablespoons finely chopped red onion
dash of garlic powder, balsamic vinegar and salt and pepper

4 skinless, boneless chicken breast halves (about 1-1/4 pounds total)

In a small bowl combine feta cheese and cream cheese; set aside. Using a sharp knife, cut a horizontal slit through the thickest portion of each chicken breast half to form a pocket. Stuff pockets with the cheese mixture. Secure openings with wooden toothpicks. Grill until cooked through and no longer pink.

Monday, December 9, 2013

Chocolate Chip Peanut Butter Brownies


Chocolate Chip. Peanut Butter. Brownies.
Do I really need to say anything else?! ;)

I adapted these from a recipe for peanut butter chocolate chip cupcakes. I wasn't in the mood to make cupcakes or mess with frosting, so I just made them into brownies. Heavenly!

Chocolate Chip Peanut Butter Brownies
1 cup unbleached all purpose flour
1 tsp baking powder
1/4 tsp salt
6 tbsp unsalted butter, at room temperature
3/4 cup smooth all natural peanut butter, at room temperature
1/2 cup packed dark brown sugar
1/2 cup sugar
2 large eggs
1 tsp vanilla extract
1/2 cup milk
2 cups semi-sweet chocolate chips

Preheat oven to 350 degrees F. Combine milk and vanilla in small bowl. Combine flour, baking powder and salt in bowl. Beat Butter and sugars in mixer until light and fluffy. Add eggs and blend until smooth. Slowly mix in peanut butter. Add in flour mixture and blend slowly. When fully incorporated, add milk mixture. Continue to blend slowly. Add chocolate chips and fold in by hand. Pour into greased 8x8 or 9x13 brownie pan and bake for 30-35 minutes until gold and brown on top. (The middle will be a little gooey, but will continue baking when you get them out...you don't want to burn the edges!)

Friday, December 6, 2013

Tortilla Chip Crusted Chicken with Avocado Ranch Sauce

This recipe was a little labor intensive, but was really good. I especially loved the avocado ranch sauce! I'm going to try the sauce as a dressing on a taco salad.

You could make it lower carb by leaving out the chips and just using the cheese, mayo and spices on the chicken. Next time I think I'll double the recipe and freeze the extras...two meals for one prep time! :) 


Tortilla Chip Crusted Chicken with Avocado Ranch
Adapted from Bacon, Butter, Cheese and Garlic

4 boneless, skinless chicken breasts
One 12-ounce bag tortilla chips
4 ounces Pepper Jack cheese, shredded
1 C mayonnaise
1/2 T garlic powder
1/2 T cumin
1/2 T chili powder
2 teaspoons lime juice


FOR THE SAUCE:

1 C mayo

1/2 C milk

1 C sour cream
1/4 C all-natural ranch dressing


1 T garlic powder

1 T onion powder


1 teaspoon lime juice
2 avocados

Preheat the oven to 350 degrees.

Put about half of the bag of chips into the food processor and blend.  You should have 2-3 C crushed chips. (Reserve the rest of the bag in case you don't have enough.)  Mix the shredded cheese and the crushed chips together.

Whisk together the mayo, garlic powder, chili powder, cumin, and lime juice.  Dredge the chicken breasts into the mayo and then into the chip mixture, pressing down to make sure it's all coated.  (Here's where you may need to grind extra chips for coating if you run out.)  When all the chicken is coated, put it in the oven and bake for about 25-30 minutes or until the chicken is done all the way through and the chips are crispy.

Blend the sauce ingredients together in a food processor and serve over the chicken.

Thursday, December 5, 2013

My 200th Post!! And Win a Gift Card!

I cannot believe this is my 200th post! The year has flown by and I'm so thankful to have you on my clean eating journey! I'm looking forward to even more clean eating and saving green fun in 2014, including exploring clean beauty and cleaning products and trying a whole bunch of new recipes. 

To celebrate and because I'm in the holiday spirit, I'm giving away a gift card to Regal Cinemas. If you've liked my Facebook page here, you're already entered to win :) If you'd like a chance to win, please head over and like me please! Once I receive 50 likes, I'll draw a random winner, so tell all your friends too!

Wednesday, December 4, 2013

Top Ten Eating Clean and Saving Green Gifts for Christmas

With Christmas only weeks away, (mostly) everyone is getting into the gift-giving spirit. Personally, I love giving gifts. It's the love language I use when showing someone they mean a lot to me and I enjoy the whole process of coming up with an idea, searching far and wide for that gift and seeing the recipient's face when they open it up.

Whether you've been done Christmas shopping since August or have yet to start, I'm here to help! I've come up with the Top Ten Eating Clean and Saving Green gifts for your holiday season. These gifts help you eat clean, save you some green and some even do both!

1. Spa Day -- For that special lady (or even guy!) in your life, consider giving them a day of pampering to a spa or salon that specializes in all-natural and organic products.

2. Subway Art -- Easy and inexpensive, a piece of unique subway art fits all sizes and is a great personalized gift for that special someone. Choose the recipient's favorite song lyrics, poem, Bible verse or quote.

3. Recipe Book -- Compile a list of your favorite Eating Clean recipes to give away to family and friends. You could create a book yourself, or use a helpful site, like Shutterfly or Bookemon, which does all the work for you!

4. Old Window Photo -- Another great personalized gift, especially for a newly married couple, family with kids or parents and grandparents. Again, the possibilities are endless for personalization. 

5. Kitchen Tools -- Every cook needs the proper tools, so consider giving several smaller, handy kitchen items or purchasing a bigger piece of kitchen equipment. Some of my favorites and must-haves...cheese grater, mandolin, spice rack, crock pot, bread machine

6. Stock the Pantry Gift Basket -- I've made all kinds of pantry staples in the last year. Put together a gift basket to stock the pantry of a friend or neighbor. Some to include...brownie mix, cooking spray, chicken stock, pasta sauce, soup or sauce mixseasoning salt.

7. Magazine Subscription -- I especially love giving magazine subscriptions because it's a gift that lasts all year! Some of my favorites for clean eating and saving green...All You, Eating Clean

8. Homemade Crayons -- For the kid, or the kid-at-heart. :) Also make a great stocking stuffer.

9. Ice Cream Ball -- Another great gift for kids or families. Fun for all and who doesn't love ice cream?

10. Gift Cards -- Consider giving gift cards to clean and all-natural stores and restaurants like Trader Joe's, Whole Foods, Earth Fare, Seasons 52, Aveda, etc.

Monday, December 2, 2013

Crockpot Beef and Noodles

I love comfort food, especially when the weather turns colder. My mom used to make the best beef and noodles when we were younger and I was craving it the other day. I searched for a clean recipe that could also be done in the crockpot (to make my life easier!) and found this one I adapted a bit.
It was delicious! So comforting and warm and yummy. It also makes a lot, so I have a whole other meal in the freezer.  
Crockpot Beef and Noodles
Adapted from Kristi's Recipe Box
2 lbs. stew meat (or any type of beef roast you have on hand, cut into 2" chunks)
2 (14.5 oz.) cans beef broth (I used my homemade chicken stock...choose a homemade or organic broth to keep it clean)
2 cups water
1 1/2 T. Italian seasoning
1 T. minced garlic
1/2 t. onion powder
1/2 t. salt
1/2 t. pepper
16 oz. pkg. egg noodles (look for an organic or all-natural egg noodle...I found mine from an Amish store :)
Place stew meat in crockpot and cover with beef broth and water. Add in Italian seasoning, garlic, onion powder, salt, and pepper. Cook on HIGH for 4 hours or on LOW for 8 hours. (With beef in the crockpot, I always opt for the lower and slower) During last 30-45 minutes of cooking, add in egg noodles.

Wednesday, November 27, 2013

Happy Thanksgiving!

Sorry for the lack of posts lately, we've been traveling a lot. I just wanted to take a quick moment to wish all my blog readers a very happy Thanksgiving...I'm so thankful for each of you for coming along in this eating clean journey with me! 


Stay tuned for some exciting things happening soon....hint hint giveaways! :)

Wednesday, November 20, 2013

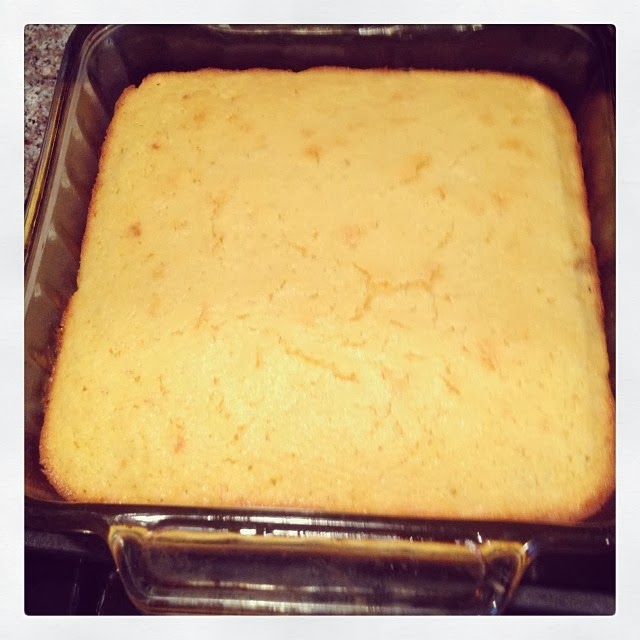
Made-from-Scratch Cornbread

Don't get me wrong...I love Jiffy Cornbread Mix just as much as the next person. I, however, do not  like the extra preservatives included in each blue box. So, I decided to experiment and make my own cornbread from scratch. I amazingly had all the ingredients I needed, so I threw these together easily and quickly. 

They turned out great! If it tells you anything, my husband called them cornbread brownies because they were so sweet and delicious :)

Grandmother's Buttermilk Cornbread
From All Recipes.com  
1/2 cup butter

2/3 cup white sugar
2 eggs
1 cup buttermilk
1/2 teaspoon baking soda
1 cup cornmeal
1 cup all-purpose flour
1/2 teaspoon salt

Preheat oven to 375 degrees F (175 degrees C). Grease an 8 inch square pan.
Melt butter in large skillet. Remove from heat and stir in sugar. Quickly add eggs and beat until well blended. Combine buttermilk with baking soda and stir into mixture in pan. Stir in cornmeal, flour, and salt until well blended and few lumps remain. Pour batter into the prepared pan.
Bake in the preheated oven for 30 to 40 minutes, or until a toothpick inserted in the center comes out clean.

Tuesday, November 19, 2013

Some More Fall Crafts Courtesy of Pinterest

While everyone else has seemed to move onto Christmas, I'm still enjoying Fall and decided to try some autumn-themed decorations I had seen on Pinterest.

The first was a pumpkin made out of mason jar or canning jar rings. I had about a dozen left over from canning this summer, so had to buy another box. You can find them for around $3 for a dozen at Wal-Mart, a dollar store, Kroger, etc. 

Lay all the rings out on a piece of cardboard or paper and spray paint with inexpensive orange spray paint (avoid the day-glo orange though!). Flip them over after they dry and paint the other side. Let dry completely, then put them all on a string (all facing the same direction) and tie the string in a knot, arranging the rings into a circle/pumpkin shape. You'll have to tie a pretty tight knot for it to keep its shape. You can do any number of things for the stem and leaf....I opted to use rolled up burlap and a green ribbon. I've also seen them done with a stick and green felt, string, etc.


Since I had the orange spray paint out already, my second project was another pumpkin, this time made from wine corks. Pull out 25 wine corks, spray paint orange (one side at a time) and glue together in a pumpkin shape using hot glue. Start with four, then five, then six, then five, then four. Again, for the stem and leaf you could do about anything, I used burlap and ribbon.

Monday, November 18, 2013

Girls Night Out at The Melting Pot

The other night, my small group girls and I went out for a much-needed Girls Night Out at The Melting Pot. They were having a Femme Fatale special, where each person could get the cheese fondue, salad, main entree and chocolate fondue for $35.

The cheese fondue course was Bourbon Bacon Cheddar Cheese Fondue, which was lager beer, garlic, mustard powder, Worcestershire, cheddar-Swiss cheese blend, a splash of Jim Beam Devil's Cut Bourbon and bacon pieces. It was AMAZING! Ooey, gooey and creamy with the definite flavor of bacon and Jim Bean. 

For the salad, I had the Spinach Mushroom, which was fresh spinach, baby Portobello mushrooms, red onion, chopped bacon and Roma tomatoes with a warm Burgundy Shallot Vinaigrette. Again, super good! I loved that the red onion was really really thinly sliced, so it gave onion flavor without being over-powering. There were a ton of mushrooms, which was great, and the vinaigrette was tangy and delicious.

The main entree was filet mignon (happy happy sigh), herb-crusted chicken and shrimp and we did the cooking style Coq Au Vin, burgundy wine infused with fresh herbs, spices and mushrooms. I didn't touch the shrimp (I know such a waste...I'm not a seafood eater though!), but the filet and chicken were delicious, especially with the teriayki dipping sauce. 

I unfortunately missed the chocolate dessert round (big sad face!). It was a great meal that was mostly clean and all-natural!

Friday, November 15, 2013

Cheddar and Corn Spoon Bread

I usually don't make a lot of sides with dinner, typically just a veggie of some sort. I decided to branch out a little bit and made this Cheddar and Corn Spoon Bread to go with steak I made the other night. 

While it was good and had a great texture, I think I prefer my Mom's corn casserole. It's sweeter tasting, not as bland and easier to throw together. I think maybe I'll try hers and "clean" it up. Stay tuned! :)

Cheddar and Corn Spoon Bread
3/4 cup yellow cornmeal
2 teaspoons baking powder
1/4 teaspoon cayenne
1 teaspoon salt
2 cups milk
1 cup buttermilk (shake before measuring)
3/4 cup fresh or thawed frozen corn kernels
4 tablespoons unsalted butter, melted and cooled
3 large egg yolks
1/3 cup chopped fresh parsley
2 large egg whites
1 cup coarsely grated Cheddar 

1. Position a rack in middle of oven and preheat to 375°F. Butter a 2-quart soufflé dish.
2. Place cornmeal in a large bowl. In a small bowl, whisk baking powder, cayenne and salt. Bring milk just to a simmer; whisk into cornmeal until smooth. Whisk in buttermilk, corn, butter, egg yolks, parsley and baking powder mixture.
3. Using an electric mixer on medium-high speed, beat egg whites just until they hold stiff peaks. Gently fold egg whites and 1/2 cup Cheddar into cornmeal mixture. Transfer to soufflé dish and sprinkle with remaining 1/2 cup Cheddar.
4. Bake until top is golden brown and spoon bread is set around edges but still slightly jiggly in center, 35 to 40 minutes. Let stand for 10 minutes before serving.

Thursday, November 14, 2013

Homemade Seasoning Salt

I don't use a lot of seasoning salt when cooking, but when I found this recipe for homemade seasoning salt, I thought it would be a good seasoning to have on hand. 

And, of course, after I mixed some up, I had to try it out, so I used it on some of our grain-fed, all-natural beef. It tastes just like the seasoning salt from the store, minus all the preservatives. Yummy!

The recipe makes a lot, so it's a great value too!


Homemade Seasoning Salt
From Budget Savvy Diva

1/3 cup table salt
2 tablespoons white sugar
2 teaspoons paprika
1 teaspoon garlic powder
1 1/2 teaspoons onion powder
1/2 teaspoon ground pepper
1/2 teaspoon ground turmeric
Pinch of cayenne pepper
1/4 teaspoon of red pepper flakes (optional)

Mix altogether and store in an airtight bag or spice jar. 

Tuesday, November 12, 2013

Repurposing Old Windows, Part Deux

Found another huge window that I wasn't sure what I would use it for since it was so big, but it was only $5 so I couldn't resist. After bringing it home and having it sit in my garage for several weeks, I decided I would use to dress up my fireplace mantel. Previously, I just had the star hanging up on the wall, but I think adding the star behind it gives the mantel more dimension and interest. Plus, I think it looks rustic and Americana and super cute :) When hanging old windows, especially large ones, be sure to use drywall anchors and heavy duty picture frame hooks.

Monday, November 11, 2013

Parmesan and Spinach Orzo

This was a cozy and comforting dish that was easy to prepare. It was a little bland, but I think adding an extra clove or two of garlic, as well as some more parm cheese would fix that. You could easily double the recipe and freeze the extras. 

Parmesan and Spinach Orzo
Adapted from Life is a Strawberry

2 and 1/2 cups whole wheat orzo
2 Tbsp. Extra Virgin Olive Oil
2 green onions, chopped
1 clove garlic, minced
salt and pepper to taste
2 tsp. flour
1 cup milk 

1 package frozen spinach, defrosted, water wrung out and chopped
1/2 cup parmesan cheese, shredded, plus extra for garnish

Cook orzo according to package directions. Set aside. Heat olive oil in a medium-sized pot over medium heat. Add onions, garlic, salt and pepper and saute for 1 minute or until onions are translucent. Add flour to form a roux and cook for an additional minute. Add about 1/4 cup of the milk to the pot and whisk to work out any lumps from the roux. When lumps are worked out, add the remaining milk and whisk to combine. Bring to a simmer and cook until sauce has thickened, about 8 minutes. Add chopped spinach to sauce and cook an additional 2 minutes or until spinach has cooked down. Remove sauce from heat. Stir parmesan cheese into sauce. When cheese has melted, add cooked orzo to sauce and toss to coat. Garnish with extra parmesan cheese and serve immediately.


Thursday, November 7, 2013

Momma's Day Out at the Salon All-Natural Style

Yes, I know this is a blog about clean EATING, but as I've learned lately, it's not just about what you put in your mouth, it's about what you put on your body as well. Anything we put on our body, from cosmetics to lotions to hair care, can be absorbed through the skin and affect us just as if we ate it. For example, if you're trying to eat gluten-free, check your lotions because many include gluten (yes really!) and every time you slather some on, your introducing gluten into your system.

So, on that note, I've decided to explore all-natural and clean beauty and health care products. If you have any suggestions on all-natural products you love, please let me know!
 

I decided to start my health and beauty product search at the salon. I was overdue for a hair cut and color and found a salon in Carmel (Tricology Salon) that uses all organic products, from the hair color to the products. From their website..."The Trichology Design Team is committed to the most advanced natural, organic, safe and effective hair and beauty products." So I made an appointment with Alex and set out for a day of (overdue) pampering. 

The experience was great! The salon is super clean, spa-like and relaxing and I loved all the different products Alex used. They all smelled great and made my hair look like a million bucks. Alex also did an amazing job on my cut and color. The highlights were the best I've ever had and my cut is so flattering. Plus, she offered me lots of tips and tricks for doing my hair at home as she was going along. She really listened to what I wanted and I am over-the-moon over my new look. I also appreciated that all the products were natural and safe, and they were still able to give me the look I want.


Wednesday, November 6, 2013

Potato-Crusted Pork Chops

This meal was all my hubby, so I don't have a whole lot of input :) He said the recipe was pretty involved prep-wise, but the chops turned out great. Very flavorful and moist, they almost tasted like the famous Indiana pork tenderloin.

Potato-Crusted Pork Chops
Adapted from Rachael Ray Mag

3 eggs
1/4 cup flour
Salt and pepper
2 pounds baking potatoes
1 pound boneless pork loin, sliced into 4 cutlets pounded 1/4-inch thick
1/2 cup vegetable oil


In a shallow bowl, beat the eggs with a fork. In a second bowl, mix the flour with 1/4 tsp. each salt and pepper. Using a box grater or a food processor with a shredding disk, shred the potatoes. working in four batches, wrap the potatoes in a clean kitchen towel and squeeze out as much moisture as possible; transfer to a large bowl. Season with 1 tsp. salt and 1/4 tsp. pepper.
 

Working with one cutlet at a time, dredge in the flour, shake off excess, dip in the egg, then press the shredded potato onto both sides of the cutlet to coat. Repeat with remaining cutlets.
 

In a large, heavy skillet, heat the oil over medium-high. Fry 2 cutlets, turning once, until the potatoes are crispy and brown, about 8 minutes. Drain the cutlets on paper towels and tent with foil to keep warm. Repeat with the remaining 2 cutlets.


Tuesday, November 5, 2013

Inexpensive Subway Art


I've always been a little afraid of wall art for my home. Aside from family pictures, I never know what to hang up on the walls. Plus, seems like most wall hangings, especially the ones I love, are expensive. Thank you Pinterest, once again, for showing me the light and giving me ideas for some money saving DIY wall art. The first wall art I tackled was the phonetic alphabet for G's room. His room is all aviation and airplanes and so when I saw the Pinterest one (on the left) I knew I wanted something similar. The secret to making this DIY subway art affordable is using Staples' option for engineering prints. At $1.99 for a 2x3 print, it's a steal. Mind you, the engineering prints only come in black and white, but that's perfect for the subway art look. 

For the airplane and phonetic alphabet, I found a black outline of an old looking airplane on Google, copy and pasted it into Publisher and then added the words in white on top of it. Whatever design or wording you do, make the background black and the wording white. Save as a JPG file, upload to Staples and order an engineering print. I then cut out the airplane (because the background of it was white, I wanted grey) and used double-sided tape to adhere to a piece of grey poster board. The frame was $5.99 from Goodwill (I sanded down the ugly brown and spray painted black). Cut the poster board to size to fit the frame, add to the frame and there you have it. Instant subway art for under $10. 

The second piece is subway art using lyrics to one of my favorite Mumford and Sons' songs, "After the Storm." I did the basically the same thing; in Publisher, I created a document with a black background and overlaid it with the words in white. I played with the fonts, changing them up line by line to give it that full subway art look. I saved it as a JPEG, uploaded to Staples and ordered as an engineering print. I then took a piece of plywood, cut to the size of the print (in my case 2x3) and painted the edges of the plywood black. I then used mod podge to adhere the print to the wood and also added two layers of modge podge on top of the print. I took a fine sand paper and very lightly sanded over the whole thing to give it a rustic, vintage look. With the print, mod podge and plywood, this one cost under $10 as well.

You can find full directions on DIY subway art at I Am Momma Hear Me Roar.